Configuring DHCPv4 in Packet Tracer
Learn how to configure DHCP in Packet Tracer. This guide walks through setting up the DHCP server how to configure clients to use it.
This article will demonstrate how to configure a Cisco DHCPv4 server and clients in Packet Tracer. You can skip the introduction and go straight to the demonstration here.
What is DHCP?
DHCP (Dynamic Host Configuration Protocol) assigns or “leases” IPv4 addresses from a pool of addresses for a limited time period to clients. When a lease expires and the client still exists within the network, the client is typically reassigned the same address. This ensures that addresses are made available when they are no longer needed by their previous owner.
When a client joins a network, it undergoes four steps to aquire a lease.
- Client: DHCP Discover
DHCPDISCOVERThe client sends a broadcast to discover available DHCP servers. - Server: DHCP Offer
DHCPOFFERThe server responds and offers an available address from the pool. - Client: DHCP Request
DHCPREQUESTThe client accepts the lease. - Server: DHCP Acknowledgement
DHCPACKThe server acknowledges the acceptance of the lease.
Before a lease expires the client will send a new DHCPREQUEST directly to the DHCP server it got it’s original lease from. The DHCP server will then return a DHCPACK in response.
Configuring DHCP
The next section will cover the commands necessary to configure the DHCP server and clients.
DHCP server setup commands
router(config)# ip dhcp exluded-address <low-address> <high-address>router(config)# ip dhcp pool <pool-name>router(dhcp-config)# network <network-address> <subnet-mask>router(dhcp-config)# default-router address <ip address>router(dhcp-config)# dns-server addressrouter(dhcp-config)# domain-name <domain>router(dhcp-config)# lease <days hours minutes OR infinite>router# show running-config | section dhcprouter# show ip dhcp bindingrouter# show ip dhcp server statisticsDemonstration in Packet Tracer
Now we will demonstrate how this works in Packet Tracer. If you want to follow along you can download the .pkt file using this link: dhcpv4.pkt
1. Configure the DHCP server
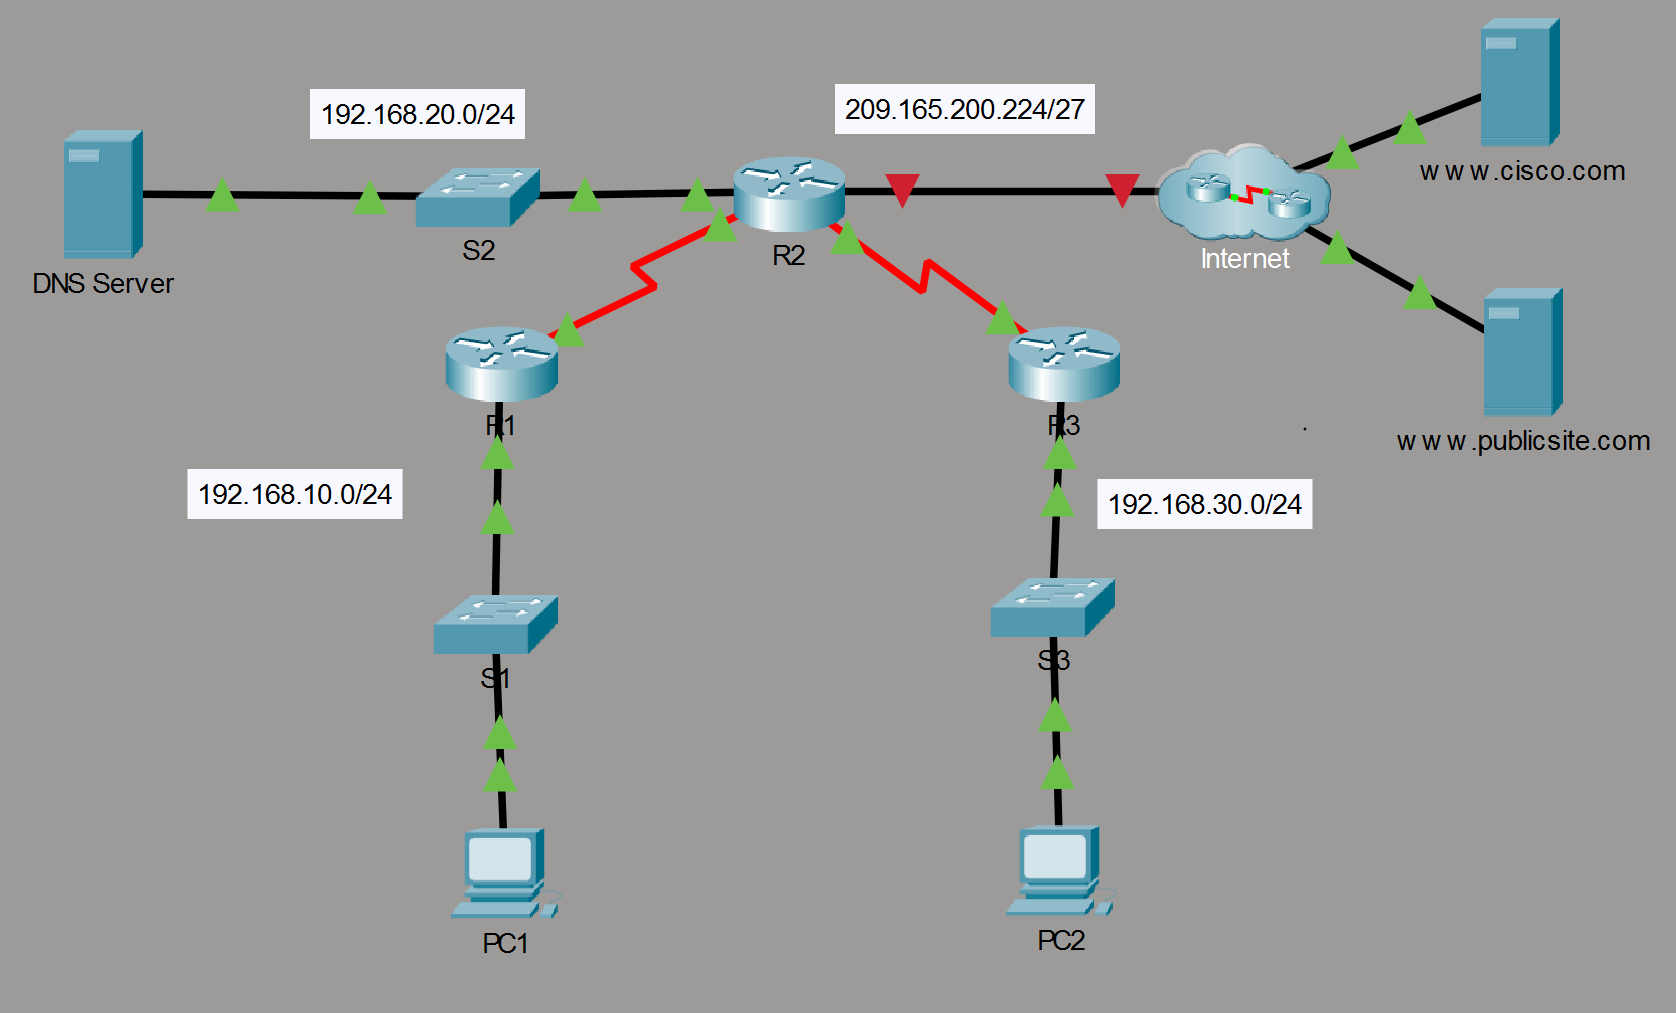
The first thing we will do is exclude the first ten addresses from both R1’s and R2’s LANs in order to reserve them to ensure scalability.
R1> enable
R1# config t
R1(config)# ip dhcp excluded-address 192.168.10.1 192.168.10.10
R3(config)# ip dhcp excluded-address 192.168.30.1 192.168.30.10
Next we create DHCP pools on R2 for both LANs. We’ll call them R1-LAN and R3-LAN respectively.
R2(config)# ip dhcp pool R1-LAN
R2(dhcp-config)# network 192.168.10.0 255.255.255.0
R2(dhcp-config)# default-router 192.168.10.1
R2(dhcp-config)# dns-server 192.168.20.254
R2(dhcp-config)# ip dhcp pool R3-LAN
R2(dhcp-config)# network 192.168.30.0 255.255.255.0
R2(dhcp-config)# default-router 192.168.30.1
R2(dhcp-config)# dns-server 192.168.20.254
2. Configure the DHCP relay
As the DHCP server is not on the same LAN as the clients we need to configure forwarding for DHCP requests. The first thing we have to do is configure the helper address for the LAN interface on R1 and R2.
R1> enable
R1# config t
R1(config)# int g0/0
R1(config-if)# ip helper-address 10.1.1.2
Then repeat for R3.
R3> enable
R3# config t
R3(config)# int g0/0
R3(config-if)# ip helper-address 10.2.2.2
Now that requests can reach the DHCP server the clients can negotiate their IP address leases.
3. Router DHCP client
In order to establish internet connectivity in this network, we need to configure R2 to recieve an IP address from the ISP. We can do so by enabling the dhcp client on the router.
R2(config)# int g0/1
R2(config-if)# ip address dhcp
R2(config-if)# no shutdown
We can verify that the router recieved an IP address using the following command.
R2# show ip interface brief
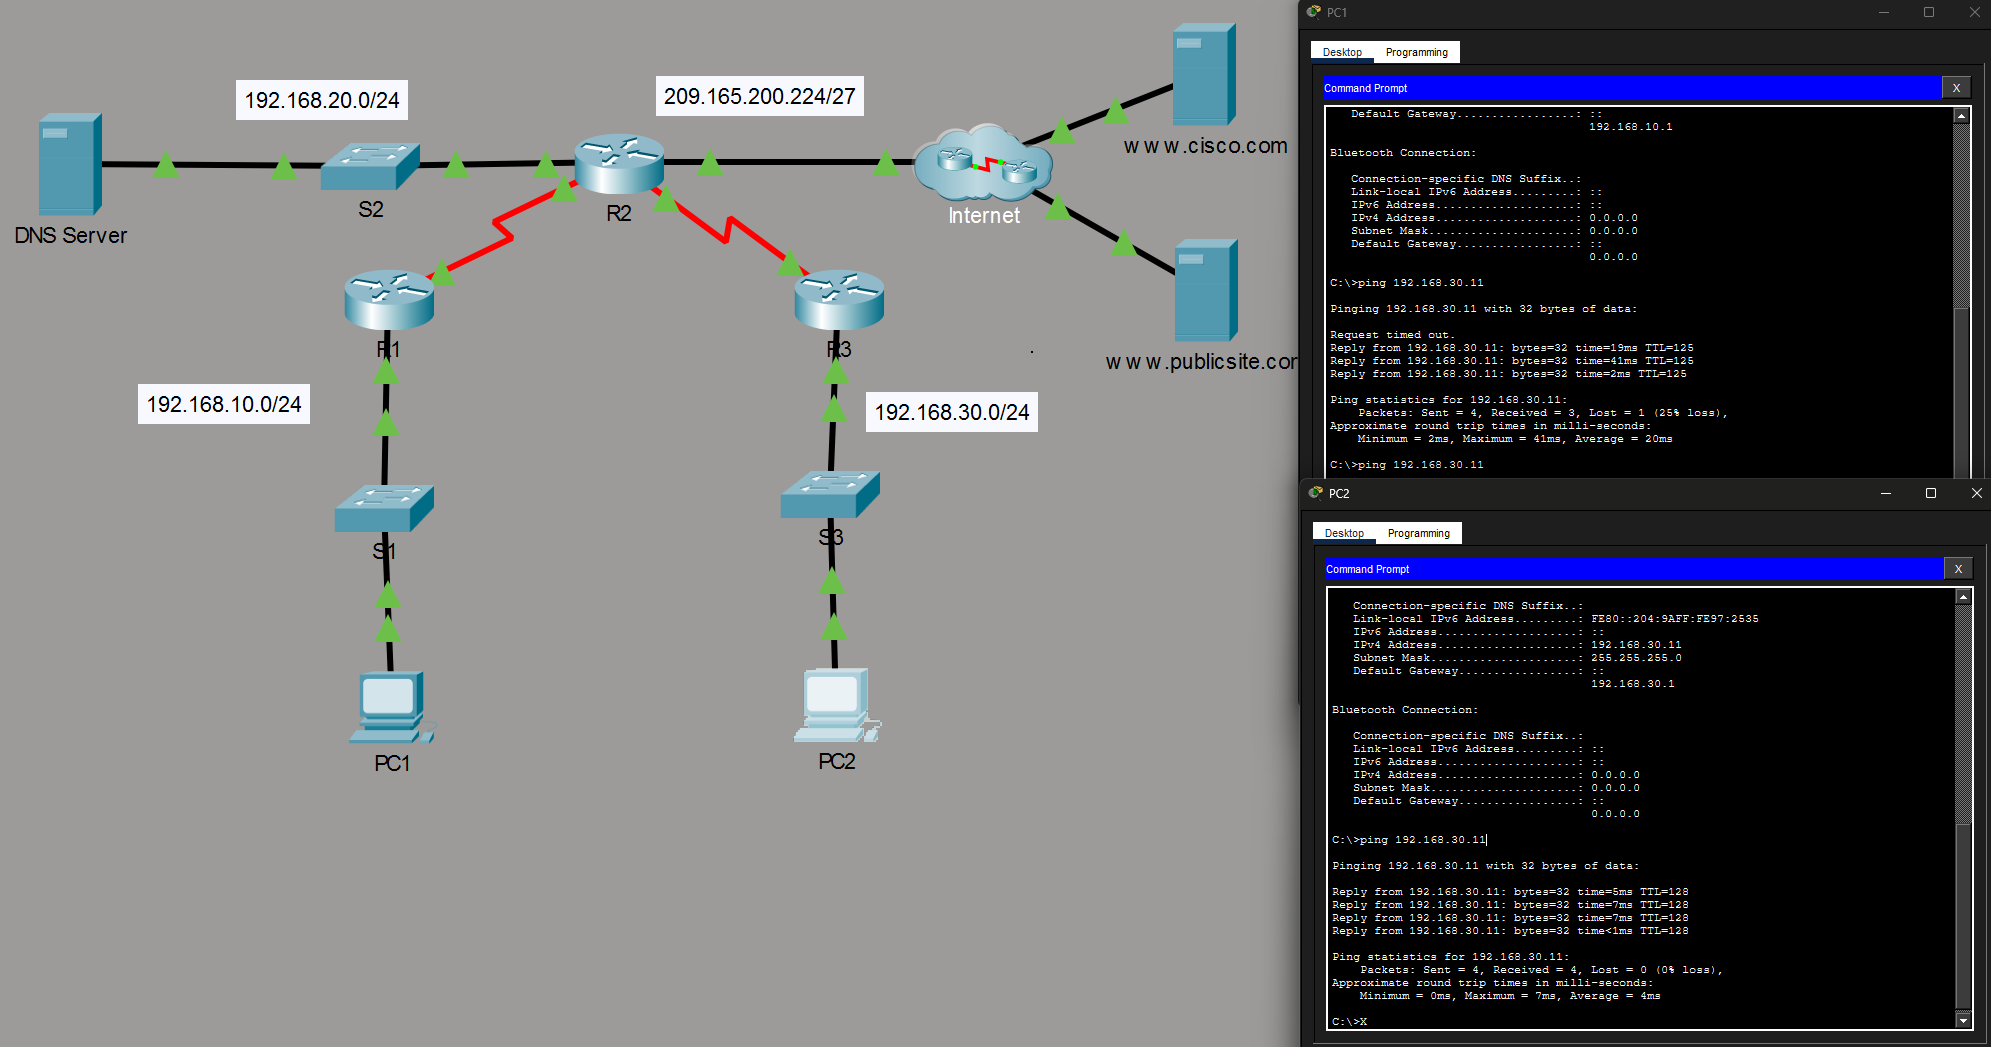
4. Test the connectivity
Now the PCs can ping eachother, we can test so in the Command-Line using ping.